Monday, November 5, 2012

Chocolate Chip Cookies


Freshly Home-Baked Chocolate Chip Cookies


This recipe is similar to the one that I used in my previous blog entry on White Chocolate and Macadamia Nut Cookies at http://myculinarymemoirs.blogspot.com.au/2012/10/white-chocolate-and-macadamia-nut.html. This recipe was adapted from ‘Taste.com.au’ and written by Dixie Elliott from Super Food Ideas – August 2004, Page 47.

Some of the changes that I made to the recipe were to use chocolate chips instead of white chocolates and macadamia nuts. Also, I preferred my cookies to have a crispy texture so I baked them for 20 minutes instead of 12 – 15 minutes in the oven.

The turnout was rather great. Crispy, slightly crunchy and tasted delicious for a cookie lover! This is an easy-to-follow and hassle free recipe. Have fun baking!


The Great Cookie Stack...


 Recipe for the Chocolate Chip Cookies
written by Dixie Elliott


Ingredients:

• 250g butter, softened
• 1 cup firmly packed brown sugar
• 1/2 cup white sugar
• 2 teaspoons vanilla extract
• 2 eggs
• 2 1/2 cups White Wings Plain Flour
• 1 teaspoon baking powder
• 200g – 250g chocolate chips


Procedure:

1. Preheat oven to 180°C. Line 3 baking trays with baking paper.

2. Using an electric mixer, beat butter, sugars and vanilla together until light and fluffy. Add eggs, 1 at a time, beating well after each addition.

3. Sift flour and baking powder over butter mixture. Add the chocolate chips. Stir with a large metal spoon until well combined.

4. Drop heaped tablespoonful of mixture onto the baking trays. Bake, 1 tray at a time, for 15 to 20 minutes or until light golden and firm to the touch. Repeat with remaining trays. Stand on trays for 5 minutes. Transfer to a wire rack to cool.


Thursday, October 25, 2012

White Chocolate and Macadamia Nut Cookies

White Chocolate and Macadamia Nut Cookies


My husband LOVES white chocolate and macadamia nut cookies and I decided to bake some for him. With one of my friend’s help, she introduced me to this web site ‘Taste.com.au’ and that was how I found this lovely cookie recipe. There were quite a few white chocolate and macadamia nut cookie recipes in this web site but this particularly one I used was my favourite. It was written by Dixie Elliott from Super Food Ideas – August 2004, Page 47.

The only change I made in the recipe was to bake my cookies for about 18 – 20 minutes as I was concerned that the cookie dough was not cooked thoroughly. If you like your cookies to be soft and chewy, 15 minutes of baking time would be ideal for the biscuits.

Try this recipe at www.taste.com.au/recipes/8050/chocolate+macadamia+bisucits. It is a quick and easy to follow cookie recipe. Have fun trying it out!


Saturday, October 6, 2012

Curry Pastry Puffs


Homemade curry pastry puffs


Curry puffs filled with potatoes and eggs
I was craving for some spicy curry puffs over the weekend and decided to make some on my own. I would like to emphasise that this is not the traditional curry puffs that we have in Singapore and Malaysia. Rather, this is an improvised homemade version of those curry puffs. I call them “Curry Pastry Puffs” instead as I used the ready-to-be-baked puff pastry sheets (from the supermarket) in my recipe. While these puffs cannot be compared to the famous Old Chang Kee curry puffs (a popular curry puff chain in Singapore), they were nevertheless good enough to satisfy my craving for spicy food.

The potato curry paste (filling of the puffs) was a success and I was very happy with the outcome. The diced potatoes were pan fried over medium to high heat and later simmered over a low heat for about 15 minutes. Simmering the potatoes helped to retain their shape, soften and prevented them from breaking apart and forming into a mushy paste. Also, if you have a preference for less spicy food, you might like to omit the dried red chillies in the recipe, and use 2 tablespoons of the curry paste instead of 3.

For the more health conscious, this recipe might be suitable for you as the puffs were baked in the oven instead of deep fried in oil. This will save us from consuming a few extra calories!


Recipe for the Curry Pastry Puffs

Ingredients:

3 – 4 tablespoons cooking oil
2 large brown onions (chopped)
1 to 2 strips dried red chillies, chopped finely (optional)
Ayam Malaysian Noya Curry Paste or a curry paste of your choice (2 - 3 tablespoons)
4 large potatoes (peeled and diced)
½ - 1 tablespoon salt (or season according to your preference)
½ - 1 tablespoon black pepper powder
1 tablespoon sugar
4 – 5 tablespoons of water (add more water if the potato mixture dries up)
6 puff pastry sheets (cut into circular sheets)
3 hard-boiled eggs (sliced into quarters)
1 egg lightly beaten
Black sesame seeds (optional)
Mint leaves (for garnish)
Tomato sauce (for garnish)


Procedure:

1. Heat a non-stick cooking pan and grease it well with the cooking oil.

2. Add the chopped onions and cook them over medium heat till they turn fragrant. Add the dried chillies and stir fry it with the onions. If you prefer your puffs to be less spicy, leave the chillies out. Take care that the onions do not get burnt at this stage.

3. Stir in the Ayam Nonya curry paste and mix well.  Once the curry mixture has turned aromatic, add in the diced potatoes. Turn the heat up and pan fry the mixture for a few minutes.

4. Add in the salt, pepper, sugar and water, and mix well.  Bring the potato mixture to a boil before simmering it for about 15 minutes over low heat. Add an additional 2 – 3 tablespoons of water if the potato mixture is too dry.

 5. Check to see that the potato mixture is cooked. The diced potatoes should be soft but not mushy and that the mixture has hardly any liquid. Turn the heat off and let the potato mixture cool down to room temperature.

6. Preheat the oven to 230 degrees. Line a baking tray with baking paper.

7. Spoon about 2 to 3 tablespoons of the potato mixture and place the sliced hard-boiled eggs onto each of the cut out pastry sheets. Fold the sheets into half and seal them up gently with your fingers. Use a fork and press its tine onto the sealed edges to form a pattern.

8. Brush the puffs lightly with the beaten egg and sprinkle some sesame seeds on them before baking them in the oven. Bake them for about 30 - 35 minutes at 230 degrees or until golden brown.

9. Garnish the puffs with fresh mint leaves and tomato ketchup. Serve them hot.


 Enjoy!!


Monday, October 1, 2012

Strawberry Heart Cupcakes


Butter cupcakes with strawberry frosting and fresh strawberries.


Birthday cupcakes baked for a special 22 year old!

Chicken and Potato Curry


Staying abroad these past few years, I have come to miss the Chicken Curry in Singapore, particularly the home-cooked ones that my mum used to make. As a child, I remember her spending hours chopping the fresh ingredients (fresh and dried chillies, onions or shallots, lemon grass, tamarind and so on), and thereafter blending them in a food processor or pounding the ingredients into a curry paste using a granite mortar and pestle.

Being lazy, I was hoping to find a suitable pre-made curry paste at the stores, so that I would not have to go through the hassle of pounding or grinding the ingredients myself! Fortunately, I found Yeo’s Singapore Curry Sauce and the Ayam Malaysian Noya Curry paste from Woolworths Supermarket. Even though I am not a fan of processed food, I nevertheless thought that their flavours were amazing! If you cannot find these same ones, try looking for similar products that are described as Noya (or Peranakan) Curry on their labels. These are the ones that will give those beautiful South East Asian flavours to your curries.

Curry paste and sauce used in the recipe.

The following recipe is easy to follow and hassle free – very suitable for someone who does not have very much time to cook, or dislikes spending too much time cleaning up in the kitchen. It may not be the best curry recipe but it is definitely a dish that I can work and improve upon quite easily.
Have fun trying this out and enjoy your home-cooked curry dish!


Recipe for the Chicken and Potato Curry (serves 4 persons):

Chicken and potato curry served with Jasmine rice.


Ingredients:

Chicken thigh meat (about 4 to 5 large pieces)
½ - 1 tablespoon salt (or season according to your preference)
½ tablespoon black pepper powder
1 tablespoon sesame oil
3 to 4 strips dried red chilli (chopped finely)
Oil for cooking
1 large brown onion (chopped)
1 tablespoon of garlic (chopped)
4 large potatoes (peeled and cut into quarters)
Ayam Malaysian Noya Curry Paste (2 tablespoons full)
Yeo’s Singapore Curry Sauce (400ml)
About 250 – 300 ml of water (add less water if you prefer a thicker curry sauce)
Coconut milk (165ml)
2 tablespoons sugar


Procedure:
1. Marinate the chicken thigh pieces with salt, black pepper, sesame oil and the dried red chilli in a large bowl.

2. Cover the bowl with cling wrap and leave the marinated chicken meat in the fridge for at least an hour.

3. Heat up a non-stick cooking wok and grease it well with cooking oil. Add the chopped onions and cook them over medium heat till they turn fragrant. Add the chopped garlic and cook it for a short while before adding the marinated chicken thighs into the wok. Turn the heat up to high and add in the potatoes.

4. Once the meat has turned slightly brown and become aromatic, stir in the Ayam Noya curry paste and mix well. Be careful not to overcook the chicken meat at this stage.

5. Add the Yeo’s curry sauce and water into the wok. Stir well and bring the curry mixture to a boil before reducing it to low heat. Cook the curry mixture for about 40 minutes.

6. Add the coconut milk and sugar into the curry mixture and bring it to a boil before simmering for another 20 minutes over low heat. Add more water if the curry gravy is too thick.

7. Turn the heat off from the stove. Garnish the chicken and potato curry with fresh mint leaves and serve with warm jasmine rice.

Enjoy!!!


Saturday, March 31, 2012

Easter Cupcakes

Easter Cupcakes
Getting ready for Easter! Butter cupcakes with chocolate frosting. Decorated with shredded coconut, chocolate eggs and baby chick figurines.


Monday, December 26, 2011

Mango Salad


Mango Salad served with christmas ham.

I had this salad at a Christmas lunch over at a friend’s place. His mum shared the recipe of this salad with me and I couldn’t help trying it out myself today. It’s a lovely salad that is so refreshing and goes very well with any type of roast – pork, chicken, turkey or beef as well as seafood. I had it today with some leftover ham and couldn’t stop for more. This is a very easy-to-make salad and I highly recommend it to all mango lovers!


Recipe for Mango Salad (serves 3 persons):


Ingredients:
3 medium sized mangoes (semi ripe)
Half of a large onion (thinly sliced)
Spring onions (finely chopped)
4 tablespoons of rice wine vinegar

Procedure:
1. Remove the seeds and skin of the Mangoes. Cut the fruit into smaller pieces.

2. Sliced the onion thinly and chopped the spring onions.

3. Place all the cut ingredients into a large bowl and add the rice wine vinegar. Mix the ingredients well and chill the salad before serving.


Christmas Goodies

Christmas Mixed Fruit Cupcakes


Christmas Holly Brownies

Saturday, October 29, 2011

Chocolate Brownies with Mixed Berries


Getting ready for Christmas with yummy desserts... One of my favourite and easy to bake recipes is the Chocolate Brownies with Mixed Berries. They are always popular among all ages.

Tuesday, October 4, 2011

Chicken Claypot Rice


Home cooked claypot rice – one of my most favourite forms of comfort food when I was growing up. It is easy to prepare and requires little cleaning after cooking this dish. All the tasty ingredients (including the rice) goes into an electric rice cooker, and after the rice has been cooked (as indicated on the electric cooker switch), it is ready to be served!

This savoury rice dish is also healthy food as very little oil is used in the cooking process.

The trick to this dish is marinating the chicken meat overnight so that the flavours of the seasoning get absorbed into the meat. This process also tenderises the meat, allowing it to be soft and tender when it is cooked.

Here is my personal recipe for this dish:


Recipe for Chicken Claypot Rice (serves 2 persons):

Ingredients:

(For marinating the chicken meat)
250g – 300g of boneless chicken thigh (cut into bite size pieces)
1 tablespoon grated ginger
2 tablespoons shaoxing wine
2 tablespoons light soy sauce
1 teaspoon salt
1 tablespoon sesame oil

(For cooking in the rice cooker)
2 cups of jasmine rice
3 cups of water
2 tablespoons sugar
2 tablespoons shaoxing wine
4 tablespoons light soy sauce
1 tablespoon dark soy sauce
1 tablespoon salt
1 tablespoon sesame oil
4 pieces of dried shitake mushrooms
1 small piece of Chinese sausage (washed and cut into small slices)
Marinated chicken meat (from above)
Spring onions as garnish

Procedure:
1. Cut the 250g – 300g of boneless chicken thigh into bite size pieces. Marinate the chicken pieces with the ginger, wine, light soy sauce, salt and sesame oil in a large bowl.

2. Cover the bowl with cling wrap and leave the marinated chicken meat in the fridge overnight.

3. Wash the rice grains thoroughly with water and drain well.

4. Drain the soaked shitake mushrooms and cut them into thin slices.

5. Wash the Chinese sausage and cut it into small slices.

6. Place the washed rice grains, water, sugar, wine, light and dark soy sauce, salt, sesame oil, marinated chicken meat, cut slices of shitake mushrooms and Chinese sausage into an electric rice cooker. Mix it well before cooking.

7. Once the rice is cooked, leave it in the rice cooker for about 10 minutes before opening the lid. Mix well, sprinkle the chopped spring onions and the rice is ready to serve!

Friday, September 16, 2011

Szechuan Braised Pork Belly


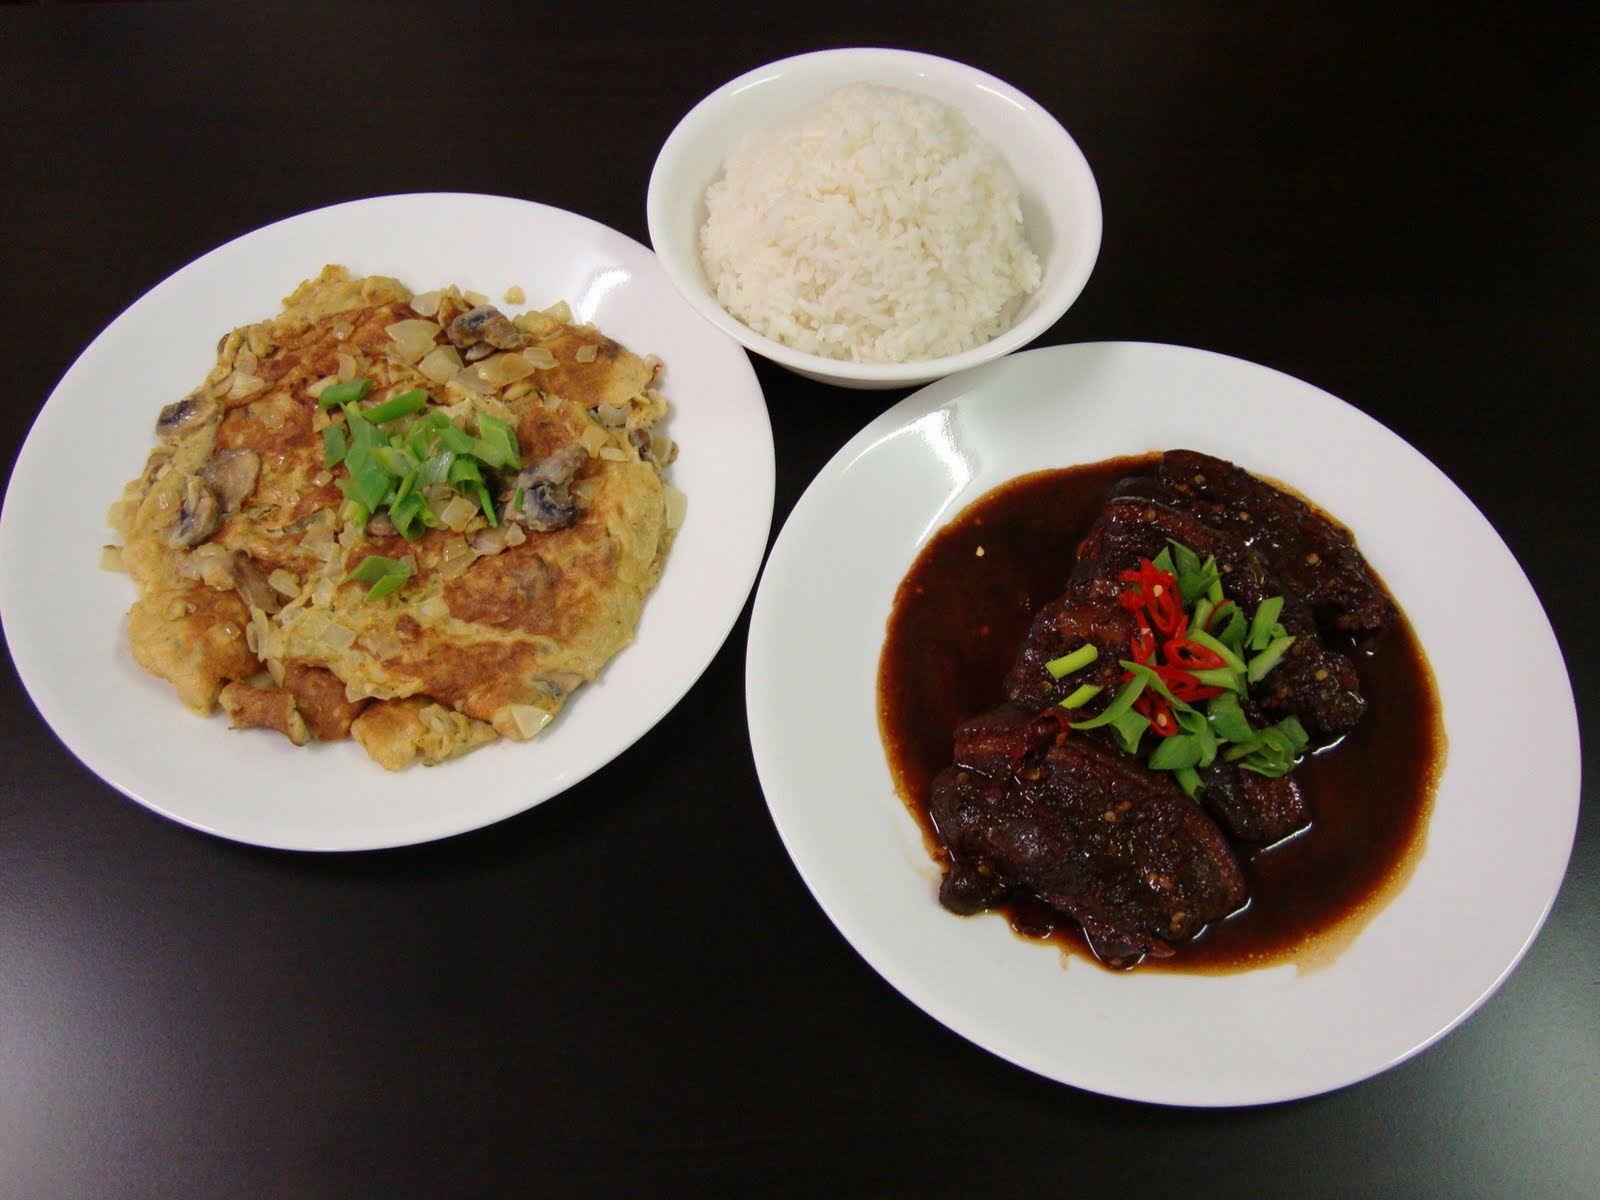
This is one of my favourite dishes – Szechuan Braised Pork Belly!!! If cooked properly, the meat ends up very soft and tender and the fats just melt in your mouth. Pork belly (also known as pork rashers) has always been one of my favourite cuts of pork. Although it has a higher level of fat content, cooking it in a more healthy way (for instance, braising) and only eating it once in a while – allows my loved ones and I to still enjoy this delicious type of meat.

This dish has a slightly spicy taste and for those who prefer to have it more spicy, you could add additional fresh red chillies and ginger to the recipe. For those who do not like spicy food, you could leave out the chillies from the recipe without sacrificing its yummy taste. That said, I personally think the fresh red chillies gives this dish a distinctive and authentic Szechuan flavour to it.

Here are my few tips to ensure that the meat for this dish is succulent and tender.

Firstly, marinate the meat overnight. Marinating the pork for a longer period tenderises the meat and makes the meat more flavoursome.

Secondly, browning the meat over high heat first before braising it over low heat for about 2 hours (or for a longer time if more meat is used) is highly recommended. Please take note that if the heat used while braising is too high, the pork belly will break into pieces and will also result in the toughening up its texture.

Thirdly, the amount of water to add into the pot before braising the meat is very important. Too much liquid might dilute the savoury taste of the dish and too little liquid could cause the meat to turn out too dry and tough.

I have written out the recipe on this dish for those who like to give it a try. This dish is best eaten with a hot steaming bowl of plain jasmine rice as it complements the strong flavours of the meat, and its gravy.


Recipe for Szechuan Braised Pork Belly (serves 2 persons):

Ingredients:

Oil for cooking
Pork Belly (about 600g)
1 teaspoon of salt
1 teaspoon of pepper powder
1 tablespoon of sesame oil
4 tablespoons of shaoxin cooking wine
4 tablespoons of dark soy sauce
4 tablespoons of light Soy Sauce
2 tablespoons of sugar
1 – 2 tablespoons of grated ginger
Spring onions (use only the bottom or whitish part, cut into 3cm sticks)
1 red chilli (sliced)
About 200ml of water (or enough to cover the surface level of the pork in the wok)

Procedure:

1. Marinate about 600g of pork belly pieces with salt, pepper, sesame oil, 2 tablespoons of shaoxing wine, 2 tablespoons of dark soy sauce and 2 tablespoons of light soy sauce in a large bowl.

2. Mix the pork belly pieces with the seasoning using your hands and while doing that, gently press the pork with your fingertips (like massaging actions).

3. Cover the bowl with cling wrap and leave the marinated pork belly in the fridge overnight or for about 24 hours.

4. Heat up a non-stick cooking pot or wok over high heat. Grease the wok well with cooking oil. Add the pork belly pieces into the wok and brown them. Dish them up onto a plate once they turned browned and aromatic (do not overcook the pork belly at this stage).

5. Heat up the same wok over a medium heat this time and add the grafted ginger and spring onions. Cook them for a short while till they turn fragrant. Add the chilli slices and cook for another minute before adding the browned pork belly pieces back into the wok.

6. Add the remaining shaoxing wine, dark and light soy sauce, sugar and water into the wok (make sure that the water level covers up to the surface of the meat only).

7. Bring to a boil and quickly lower the heat to low heat. Braise the pork belly pieces for about 2 hours over low heat.

8. Throughout the cooking process, check to make sure that the liquid in the pot does not dries up. The liquid should be reduced and thicken to a dark coloured sauce or gravy at the end of the cooking. If the liquid is reduced too much, lower the heat and add a bit of water to the work. You should also turn over the pork belly pieces a few times while cooking to ensure that the meat is cooking evenly in the liquid and does not end up dried up.

9. After 2 hours, turn the heat off from the stove. Serve the pork belly pieces with fresh red chillies and chopped spring onions.

Enjoy!!!

Monday, July 4, 2011

Strawberry Jam Cupcakes


Strawberry Jam Cupcakes

I read up on a cupcake recipe recently and was very keen to try it. I was rather pleased that it turned out quite nicely. I modified the recipe a little and filled the cupcakes with strawberry jam and called them strawberry jam cupcakes.

The cupcakes could have turned out nicer if they were slightly more moist. However, my husband and one of my friends enjoyed them very much and it was such a joy to see them eating the cupcakes!


Freshly baked cupcakes!


Cupcakes decorated with icing sugar and strawberry jam.


A cross-sectional view of a cupcake.


Sunday, July 3, 2011

Inarizushi Bento

Bento - inarizushi with avacado and egg omelette rolls.

Inarizushi is a fried tofu pouch that is usually filled with sushi rice. I wanted to make my own inarizushi but I could not find the tofu pouches or inarizushi at the shops in Townsville. Undeterred, I bought a pack of the pre-seasoned tofu pouches from Singapore and had it shipped over to me in Townsville.


Pre-seasoned tofu pouches from a NTUC supermarket in Singapore.

Instead of just filling the tofu pouches with sushi rice, I made a mushroom and carrot mix with the sushi rice before stuffing the filling into the tofu pouches. It was quite a success and the inarizushi tasted really yum! I packed them nicely into a bento box for my husband’s afternoon tea and he really liked it.

To make the rice filling for the inarizushi, I stir-fried some diced carrots and dried shiitakae mushrooms and added the following seasoning: soy sauce; sugar; Chinese cooking wine (as a substitute for sake) and shiitake liquid (used to soak the mushrooms) while cooking it. After that, I mixed the mushroom mixture with the cooked sushi rice (mixed with sugar, salt and rice wine vinegar) and added toasted black sesame seeds and tiny cuts of nori sheets at the end. After the mushroom and rice mixture was well mixed, I shaped them into balls with the cling wrap and stuffed them into the tofu pouches.

 
Delicious inarizushi with mushrooms, carrots and sushi rice.

They tasted great especially with the toasted black sesame seeds which gave that added aromatic flavour in the inarizushi. They are healthy to eat and go very well as a bento boxed lunch or snack.


Sunday, June 19, 2011

Maki Sushi


A delectable plate of home-made maki sushi! Yum!

From a long holiday, to a big move, new job, some dramatic experiences suffered during a natural disaster and finally having a new kitchenette, I finally had a chance to cook again recently. As you can imagine given the long absence, I am now so excited to be trying out new recipes and blogging once again.

I learnt how to make sushi over the internet about a year ago after discovering that there were very few Japanese restaurants in Townsville. Being a great fan of Japanese food, I decided not to let this stop me from trying my hand at it, so I took the DIY route and made my own “personal” brand of sushi. I soon found that the art of making good sushi rice required a well balanced solution of salt, sugar and rice wine vinegar. This has to be mixed in well with the cooked sushi rice while the latter is still warm. The rice mixture also has to be kept moist so that it will not be too dry or wet when rolled with the nori sheets. It is the vinegar solution that gives the sushi rice the aromatic flavour as well as the beautiful glaze.


Cooking sushi rice in a rice cooker.

Mixing the cooked sushi rice with the vinegar solution.
                                                                              
Personally, I think sushi is healthy food. You do not require any fat to cook it and you can choose your own choice of fillings depending on your palate and dietary needs. It is also particularly suitable for vegetarians or health-conscious people who prefer a sushi roll wrapped with fresh carrot sticks or a mixed salad filling. The fillings that I used in my maki sushi were seafood sticks, avocado and home-made tamagoyaki (slightly sweetened egg omelette). Another easy-to-prepare filling that I used was tuna mayonnaise (canned tuna with mayonnaise, salad sauce and seasoned with pepper and salt). All of this is fairly simple once you get the hang of making your own sushi. There was no fuss caused by tedious food preparation, deep-frying, stir-frying or long stewing time and so on. With a rice cooker, one could easily prepare their own sushi rolls.


Some of the fillings used for the maki sushi are tamagoyaki, seafood sticks, avocado and tuna mayonnaise.

 I used the sushi making moulds in my first few attempts of making sushi. However, I found cleaning the moulds quite troublesome, and was not all that much simpler to use than if I had made the sushi using the traditional sushi bamboo mats. No surprise – I now use the bamboo mats instead of the moulds. They are easily available at most supermarkets (the Asian/ Japanese section) and are relatively affordable.

If you want to explore and make your own sushi, do try it. It is certainly very fun, cheaper than buying them from a sushi bar, and tastes almost as good as the ones sold in the shops.


Placing the nori sheet, sushi rice and fillings neatly on the bamboo mat.


Maki sushi filled with tamagoyaki, seafood sticks and avocado.
  
Maki sushi filled with tuna mayonnaise and avocado.

Home-made slices of tamagoyaki garnished with pickled ginger.


Thursday, November 25, 2010

Banana Fritters


Banana fritters coated with icing sugar.

I made some banana fritters and the batter turned out to be quite nice with a lovely crunch. The batter was fairly easy to prepare. I used self-rising flour, eggs, water and some oil for the batter. The bananas on the other hand, were slightly unripe and the fritters did not turn out to be the way I expected. Lesson learnt: use ripe bananas for making fritters. Nevertheless, the batter was quite a success from this attempt.


Wednesday, November 24, 2010

Yaki Soba


I bought some soba noodles some time back and wanted to make cold soba with it. Unfortunately, I did not have the ingredients for that noodle dish and made Yaki Soba instead. ‘Yaki’ means grilled, broiled or pan-fried in Japanese while ‘Soba’ is a type of Japanese noodles made from buckwheat flour. This noodle dish is basically a stir-fry with meat and vegetables. I chose chicken meat, carrots, mushrooms and brown onions for my yaki soba and the combination of the ingredients went quite well. Although mildly flavoured, it was still a tasty dish.


Serve Yaki Soba while it is hot with chopped spring onions and nori strips.


Yaki Soba Recipe (serves 2)

Ingredients:
1 large chicken thigh (sliced thinly)
½ teaspoon salt
¼ teaspoon pepper
½ teaspoon corn flour
3 tablespoon soy sauce
3 teaspoon sugar
2 teaspoon sesame oil
180g of soba noodles
½ of a small brown onion (sliced)
1 small carrot (sliced thinly)
1 brown mushroom (sliced thinly)
1 egg (lightly beaten)
Spring onions (chopped)
Small piece of nori sheet (cut into small strips)


Procedure:
1. Marinate the chicken slices with salt, pepper, corn flour, 1 tablespoon of soy sauce and 1 teaspoon of sugar for at least an hour.

2. Bring a large saucepan of water to the boil. Add the soba noodles and cook for 1-2 minutes. Drain and rinse the noodles under cold water. Leave it for later use.

3. Mix the remaining soy sauce, sugar and sesame oil in a bowl.

4. Heat up a wok with some oil and stir-fry the chicken meat until lightly browned (do not overcook the meat). Remove it from the heat and leave it for later use.

5. Heat up some oil in the wok again and stir-fry the onions for a while before adding the carrots and mushrooms.

6. Add the cooked soba noodles, chicken meat and sauce mixture into the wok and combine well.

7. Make a well in the centre, pour in the beaten egg and cook for 1-2 minutes. As soon as the egg starts to set, stir though with the noddles.

8. Dish up the noddles and garnish it with the chopped spring onions and nori strips.